Hexagonal Architecture
An implementation guide
Chapter 3: DEVELOPMENT SEQUENCE
TABLE OF CONTENTS
1.- INTRODUCTION
This is the third article of a series showing how to implement an application according to Hexagonal Architecture, also known as Ports and Adapters pattern, whose author is Dr. Alistair Cockburn.
So far we have seen the application design (Chapter 1) and structure (Chapter 2). As a result of the design, we got two things:
- A diagram showing the hexagon with the adapters we want to develop.
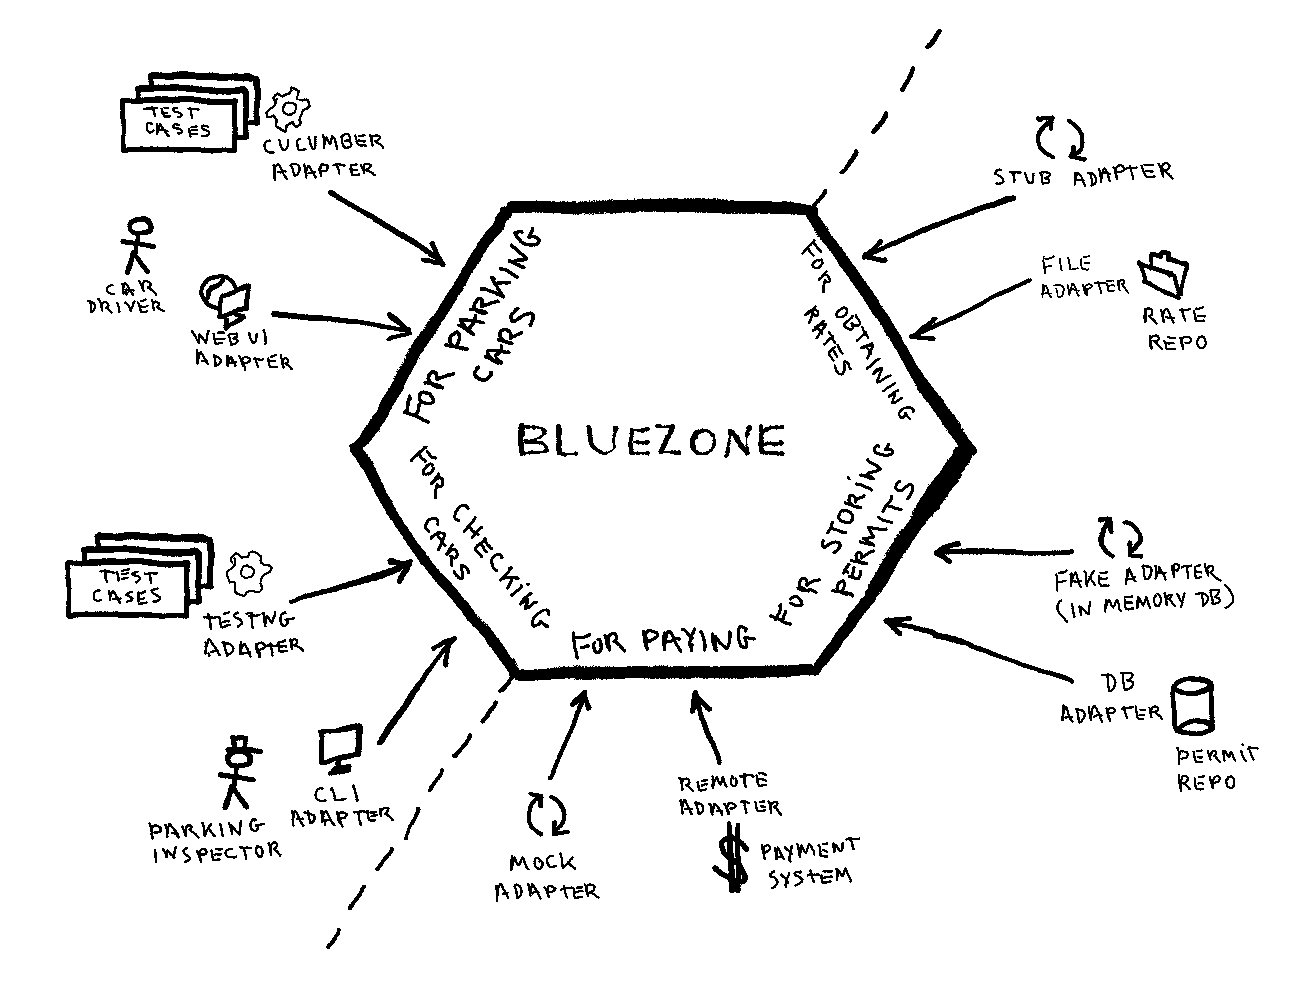
Figure 1: The big picture
-
The API definition, i.e. the interfaces (driver ports) with methods (use cases) that the application offers to users (driver actors).
- ForParkingCars interface (
getAllRatesByNameandissuePermitmethods). - ForCheckingCars interface (
illegallyParkedCarmethod).
- ForParkingCars interface (
From these two things, we will begin to implement the different modules of the architecture, following a development sequence.
According to Alistair Cockburn (see for example his talk about Hexagonal Architecture at Agiles2020 conference), this development sequence would have some stages:
| STAGE | DRIVER SIDE | HEXAGON (APPLICATION) |
DRIVEN SIDE |
|---|---|---|---|
| (S1) | Test cases | Hardcoded | - |
| (S2) | Test cases | Real | Test doubles |
| (S3) | Real | Real | Test doubles |
| (S4) | Test cases | Real | Real |
| (S5) | Real | Real | Real |
We can see that we start with test harness at both sides: first on the left side (S1) and then on the right side (S2).
From that moment on, we add real adapters at both sides: first we change left side technology (S3) and then we change right side technology (S4).
So that finally we get the application running in a production environment with real adapters at both sides (S5).
Some important things to remark:
- A test case is also a user of the application. And not just a user like any other else, but the first user.
- After S1, the left side is done. We will have the driver adapter (test harness) with a configurable dependency on the hexagon.
- After S2, the hexagon is done. At this point we have our application (business logic) done, since it can be tested in isolation from real world items. This is the main goal of Hexagonal Architecture.
- The inner development strategy and structure of each module (hexagon and adapters), are orthogonal to hexagonal architecture, it’s your business. So, for example, it’s up to you to use either an outside-in or an inside-out approach to develop the business logic, to structure it using layers or not, etc.
- It falls out of the scope of these article series to fix a terminology for the different existing test categories (unit, functional, acceptance, end-to-end, system, etc). The most important thing is that hexagonal architecture lets you test the business logic in isolation from real world devices (technologies). Call this test whatever you want, the important thing is what it means.
- The hardcoded version of the hexagon implemented in S1, is also useful when developing real adapters for driver ports in S3, since we can “mock” the hexagon to test the driver adapter.
2.- HARDCODED HEXAGON
In this section we will see the first stage in the development sequence: “Test Cases + Hardcoded Hexagon”.
Source code for this stage is available at stage1 tag in BlueZone GitHub Repository.
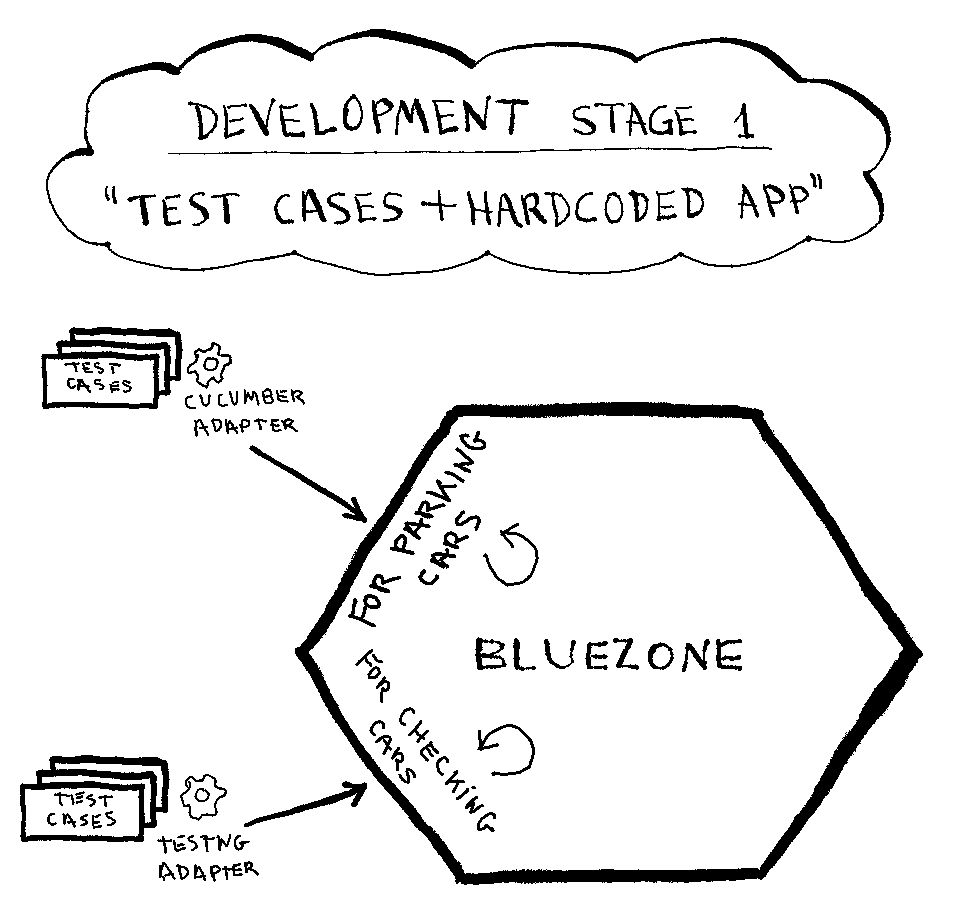
Figure 2: First development stage: Test Cases + Hardcoded Hexagon
We have these modules:
- bluezone.adapter.forparkingcars.test: This adapter launches Cucumber tool from the command line, in order to run test cases against
ForParkingCarsinterface methods. Cucumber is a test automation tool built to support BDD (Behavior-Driven Development). If you are interested in BDD and Cucumber, see the Links section at the end of this article. - bluezone.adapter.forcheckingcars.test: This adapter tests
ForCheckingCarsinterface methods. To show different testing tools, this time we use TestNG framework, instead of Cucumber. - bluezone.hexagon: This module contains the API, i.e. the driver ports (
ForParkingCarsandForCheckingCarsinterfaces), and the classes implementing them using hardcoded values (HardCodedCarParker and HardCodedCarChecker). In this first development stage, driven ports aren’t used yet. - bluezone.startup: This module instantiates the different components, builds the whole system, and runs the driver adapters. It deserves a chapter on its own, explaining different startup modes. So we will see it at the end of these article series.
README.md file at BlueZone GitHub repository explains how to run the application.
Here you can see screen-shots of HTML reports, generated after running test cases:
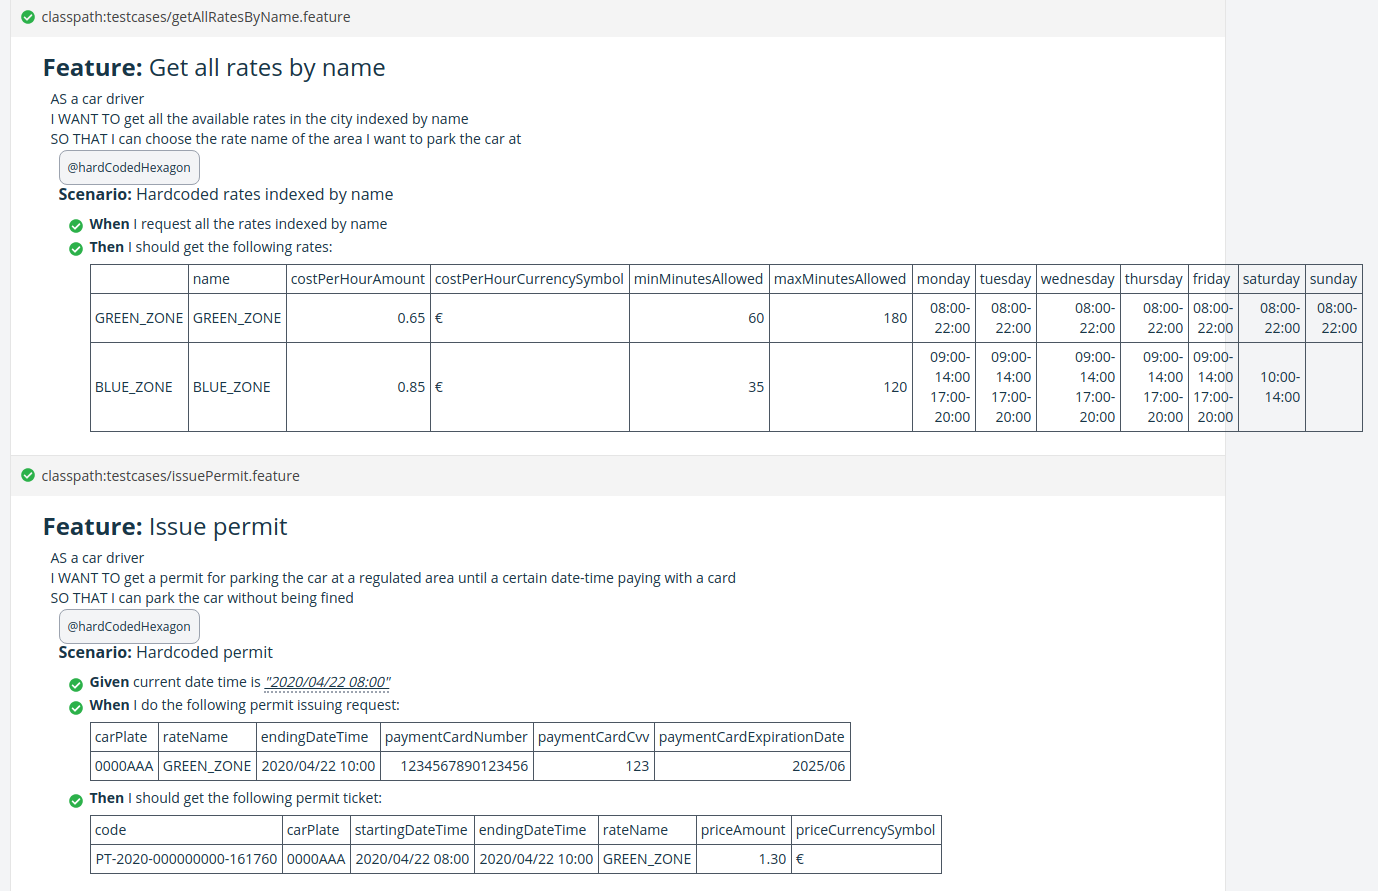
Figure 3: "for parking cars" test HTML report, generated by Cucumber
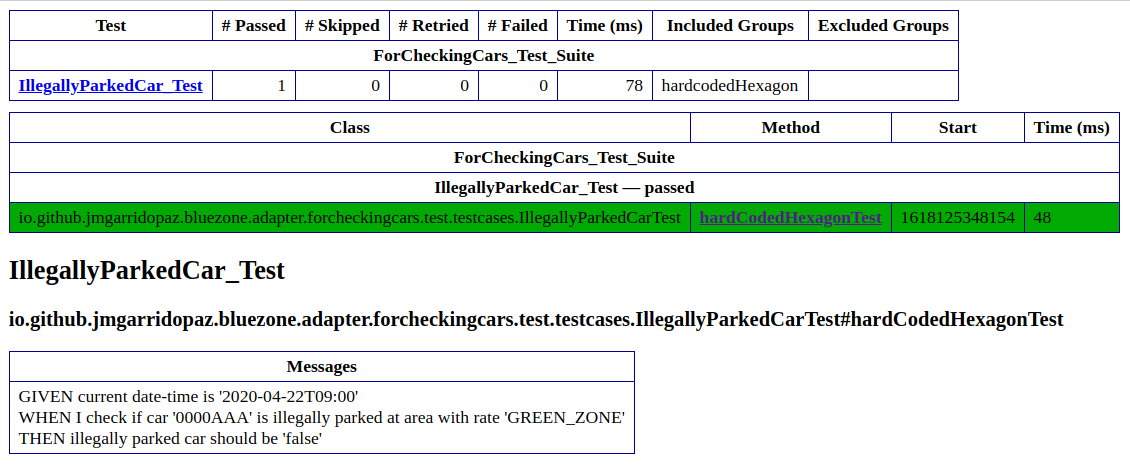
Figure 4: "for checking cars" test HTML report, generated by TestNG
In the next stage we implement test doubles as adapters on the right side.
Let’s see.
3.- THE HEXAGON IN ISOLATION
TODO ASAP
4.- ADDING REAL ADAPTERS
TODO
5.- LINKS
- Hexagonal Architecture resources:
https://jmgarridopaz.github.io/content/resources.html
- Cucumber Website:
- “Behavior-Driven Development” (BDD) at Wikipedia:
https://en.wikipedia.org/wiki/Behavior-driven_development
- “Behavior-Driven Development from scratch”, an article by Julien Topçu:
https://beyondxscratch.com/2019/05/21/behavior-driven-development-from-scratch/
- “Implementing Functional Tests in Domain-Driven Design & Hexagonal Architecture using Cucumber”, an article by Julien Topçu:
- TestNG, a testing framework for Java: